Caulking, a traditional method of restoring and repairing old surfaces, has long attracted the attention of craftsmen and restoration enthusiasts. Caulking is used to fill cracks sealing gaps, chips, and other damage to the original beauty and durability two surfaces. However, many people wonder: Is it possible to caulk old or caulk over old?
This article will address this question and provide information on the caulking process, the specifics of working with existing caulk, and the applicability of this method on different types of surfaces. Regardless of second layer of caulk or your experience, you will be provided with useful information to begin repairing your caulking over old caulk or cracked caulk, with confidence and professionalism.
Can You Caulk Over Caulk?
If you caulk over caulk, you reinforce the previous sealant while making it more attractive. However, there are at least a day few important factors to consider:
- The first is to make sure that the old caulk is securely fastened and has no cracks or damage.
- The second factor is the allowable thickness of the caulk; too thick a layer can lead to durability problems.
- The third factor is that the composition of the new caulk should be compatible with the material of the old caulk.
- Fourth, make sure the surface of the old caulk is well cleaned and prepared before applying the new layer.
- Fifth factor: the caulking process should follow the manufacturer’s recommendations and instructions.
If all of these conditions are met, the new caulk tube and caulking, over the old caulk tube, can be done successfully.
What Are The Various Types Of Caulking?
There are several types of caulking that are used, depending on the specific task at hand. Here are some of them:
Gypsum Caulking
This is apply caulk is the most common type of caulking. It consists of gypsum powder that is mixed with water to a paste consistency. Gypsum caulk is usually used to level surfaces before painting or installing cladding materials.
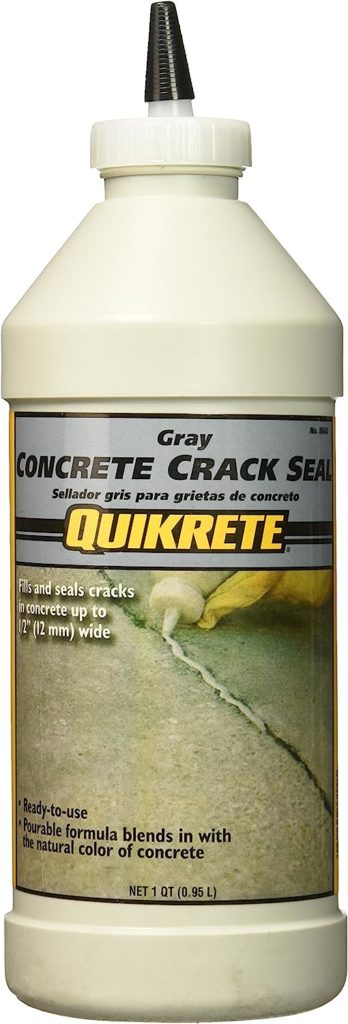
Cement-Based Caulk
This type of caulk contains cement in its composition, making it more durable and suitable for use on rougher surfaces such as concrete walls or ceilings. Cement-based caulk is typically used for interior joints, exterior work or in heavy-duty areas.
Clay Caulk
This type of caulk is made from a mixture of clay, sand, and water. It has good thermal and acoustic insulation properties and can be used to fill cracks and chips in walls.

Epoxy Caulk
This caulk contains epoxy resin, which has high strength and excellent resistance to chemical attack. Epoxy caulk is used to repair floors and surfaces where high durability is required.
Acrylic Caulk
This type of acrylic-based silicone latex caulk has good adhesion and resistance to moisture. It can be used for both interior and exterior applications. When cleaning acrylic caulk, you can use soap and water. A flexible and paintable caulk, acrylic latex caulk fills gaps around window frames, doorframes, and baseboards.

Silicone Caulk
Silicone caulk is a silicone-based sealant that has good adhesion to various materials and excellent resistance to moisture, heat, and chemicals. It can be used both for interior and exterior work.
These are just some common types of caulking. The choice of a specific type old caulking depends on the working conditions and the requirements of the surface to be filled or repaired.
Silicone caulk is often used in the bathroom or kitchen to create a watertight seal to prevent water damage, mold, and rot.
Cleaning Tips Before Caulking An Old Caulker
Before you start caulking old caulk with acrylic, silicone, or polyurethane caulk, it’s important to properly prepare the surface. Here are some tips for cleaning before using caulking over old silicone, acrylic caulk, or silicone caulk:
Clean the surface: The first step is to remove any residue from the very old layer of moldy caulk top. You can use caulk hardener or a knife to carefully remove the old, moldy caulk top layer. Clean the surface and surrounding areas with rubbing alcohol to remove as much oil as possible. You can also use a caulk remover to remove the caulk
Removing dirt and dust and cleaning acrylic acrylic latex caulk on: Before applying new acrylic latex caulk on, clean any dirt, dust, or other contaminants from the surface. Use a brush, hoover, or rag to remove all particles from the surface.
Disinfect the surface: If the surface shows signs of mold growth, fungus, or other microorganisms, disinfection is recommended. Use a special antimicrobial agent or dilute plain white vinegar with water in a 1:1 ratio and apply it to the surface. Wait a few minutes, then wipe the surface with a clean cloth.
Getting rid of grease and oils: If wet surfaces are contaminated with grease or oil, use a detergent or degreases to remove these substances. Apply detergent to the surface, leave for a few minutes, then wipe with a clean cloth or sponge.
Sanding: In some cases, it may be necessary to sand the surface before caulking. This will help create a surface that is more even and suitable for the caulking job. Use sandpaper or a sanding block to remove irregularities and make the surface smooth.
Give It Time To Dry Out
After the cleaning process is complete, give the caulk time to dry. It is recommended to apply silicone caulk and give it 24 hours to dry completely before applying new silicone caulk. It is important not to use paper towels or fiber cloths to dry caulk gun the area.
If any residue from the paper towels or fibers is left on the surface, it may prevent the new silicone caulk from adhering properly. Instead, it is recommended that you use a clean and smooth rag or soft paper towel to gently remove any excess moisture and re caulk.
Note that the drying time of caulk can vary depending on the type and thickness of caulk used, as well as environmental conditions such as temperature and humidity. Make sure you follow the caulk manufacturer’s instructions for optimum results.
Here Are 10 Steps For Caulking Over Existing Caulk
If you want to get new caulk, over existing caulk, you will need to follow a few steps.
The 10 Basic steps For Caulking Over Existing Caulk:
Step 1. Prepare The Surface
Clean the old and new caulking off from dust and dirt using a brush or hoover. Make sure the surface is dry and free of any residue. Any residue in the caulk will prevent its proper adhesion.
Step 2. Examine The Condition Of The Existing Caulk
Check to see if there are any cracks, dings, or other damage to the surface. If there are, correct them by applying additional caulk or repair materials.
Step 3. Prepare A New Batch Of Caulk
Follow the manufacturer’s instructions for preparing fresh caulk. This usually involves mixing caulk powder with water until smooth.
Step 4. Apply The First Coat Of Caulk
Using a trowel, apply a thin layer of new caulk to the surface, filling in inter-panel joints and levelling the surface. Work carefully and evenly.
Step 5. Allow The First Layer Of Caulk To Dry
Allow the first layer of caulk to dry. Allow it to dry completely according to the manufacturer’s instructions. Drying time may vary depending on the type of caulk.
Step 6. Clean The Surface
Use sandpaper or sandpaper to remove any irregularities and smooth the surface. Be careful not to apply too much pressure and damage the wall.
Step 7. Remove Dust And Dirt
After sanding, clean any dust and dirt that has formed from the surface with a brush or damp cloth.
Step 8. Repeat The Sanding Process
Apply a full second layer of coat of caulk to entire edge of the surface to improve the filling of panel and tight seal of joints and achieve a smoother finish.
Step 9. Allow The Second Coat Of Caulk To Dry
Make sure the second coat is completely dry before moving on to the next step. Follow the directions on the package for drying time.
Step 10. Complete The Finishing Process.
Clean dust and dirt from the surface, then apply a paint or other finish of your choice to complete the caulking process.
When You Should Not Re-Caulk Old Caulking?
Normally, revealing old caulk is not recommended because it and moisture damage can compromise the quality and reliability of the repair. Here are a few cases when you should not reseal old caulk:
Sufficient time has elapsed: If it has been a long time since the caulk was originally caulked, it may have already worn out and lost its properties. In this case, it is recommended to completely remove the old caulk and make a new repair.
Damage or deformation: If the caulk has been damaged or deformed, e.g., due to strong external influences or structural damage, then re-caulking may not be sufficiently effective. It is better to replace the caulk over old damaged area using fresh materials.
Quality of the previous repair: If the previous repair was done incorrectly or inappropriate materials were used, resealing the old bead caulking with new bead alone may not be effective. In such cases, it is recommended that the new bead caulking be done with the correct methods and materials.
In general, if the old caulk does not provide better seal, adequate strength, stability, or aesthetic appearance, it is better to remove it and perform a proper seal or fresh repair to ensure long-term and reliable restoration of the surface or structure.

Frequently Asked Questions: Can you caulk old caulk?
Is Silicone Caulk Compatible With Polyurethane Caulk?
Silicone and polyurethane caulks are quite compatible, as they are both used to fill gaps and cracks. However, it is recommended that you check the manufacturer’s instructions for each specific product before use to ensure they are compatible with each other and meet your needs.
Some manufacturers may recommend certain types of caulk for specific materials or situations.
What Tools Do We Use To Caulk?
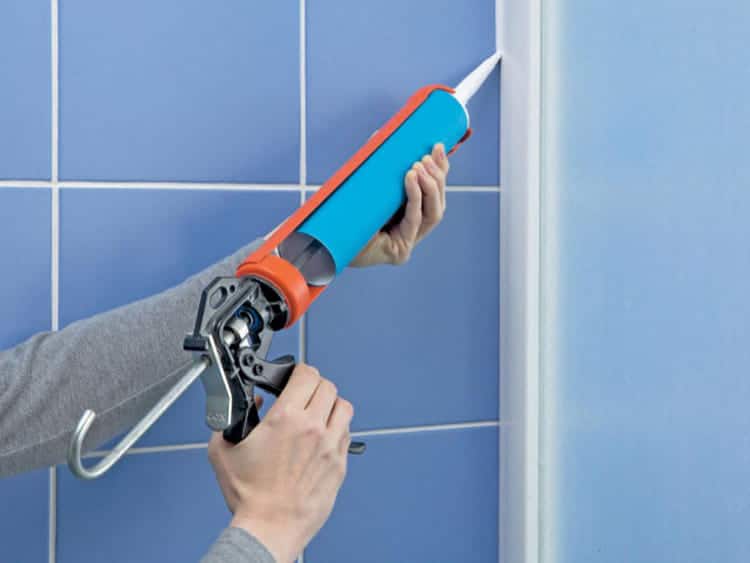
Caulking gun: This caulking gun is a hand-held tool that allows caulking to be applied using compressed air or mechanical force. It provides an even and controlled distribution steady pressure of caulk.
Putty knife: is a utility knife, it is used for applying and using latex caulk and levelling it. It can be made of metal, plastic or rubber and its shape can vary according to preference and task requirements.
What Is The Best Time To Reapply Caulk Over Old Caulk?
The optimum time to apply a new, fresh layer of caulk over the old layer can depend on several factors, such as the type of caulk used, environmental conditions, and the condition of the old caulk layer itself.
It is generally recommended to follow the directions on the packaging of the specific product, as different manufacturers may have their own recommendations. In general, the old caulk should be cleaned of dirt, dust, and other contaminants before applying a new layer of caulk over the old layer of caulk.
If the old layer of caulk is cracked, broken, or otherwise damaged, it is recommended that the necessary repairs be made. It is also important to consider the environmental conditions. It is best to apply a second layer of caulk when the temperature and humidity are in line with the manufacturer’s recommendations.
This usually means choosing a time of day and season with optimal weather conditions so that the caulk will dry and cure properly.